- Medical Image Segmentation With UNET
- Real-Time License Plate Detection Using YOLOv8 and OCR Model
- Real-Time Human Pose Detection With YOLOv8 Models
- Customer Service Chatbot Using LLMs
- Document Summarization Using Sentencepiece Transformers
- Semantic Search Using Msmarco Distilbert Base & Faiss Vector Database
- Question Answer System Training With Distilbert Base Uncased
- Image Generation Model Fine Tuning With Diffusers Models
- Predictive Analytics on Business License Data Using Deep Learning
- Complete CNN Image Classification Models for Real Time Prediction
- Linear Regression Modeling for Soccer Player Performance Prediction in the EPL
- Insurance Pricing Forecast Using XGBoost Regressor
- Chatbots with Generative AI Models
- Nutritionist Generative AI Doctor using Gemini
- Cervical Cancer Detection Using Deep Learning
- Skin Cancer Detection Using Deep Learning
- Blood Cell Classification Using Deep Learning
- Glaucoma Detection Using Deep Learning
- Leaf Disease Detection Using Deep Learning
- Banana Leaf Disease Detection using Vision Transformer model
- Vegetable classification with Parallel CNN model
- Crop Disease Detection Using YOLOv8
- Automatic Eye Cataract Detection Using YOLOv8
- Voice Cloning Application Using RVC
- Learn to Build a Polynomial Regression Model from Scratch
- Loan Eligibility Prediction using Gradient Boosting Classifier
- BigMart Sales Prediction ML Project in Python
- Word2Vec and FastText Word Embedding with Gensim in Python
- Build Regression (Linear, Ridge, Lasso) Models in NumPy Python
- Build a Customer Churn Prediction Model using Decision Trees
- Build Regression Models in Python for House Price Prediction
- Credit Card Default Prediction Using Machine Learning Techniques
- Topic modeling using K-means clustering to group customer reviews
- NLP Project for Beginners on Text Processing and Classification
- Skip Gram Model Python Implementation for Word Embeddings
- Sentiment Analysis for Mental Health Using NLP & ML
- Time Series Analysis and Prediction of Healthcare Trends Using Gaussian Process Regression
- Build a Hybrid Recommender System in Python using LightFM
- Time Series Forecasting Using Multiple Linear Regression Model
- Build an Autoregressive and Moving Average Time Series Model
- Time Series Forecasting with ARIMA and SARIMAX Models in Python
- Build Multi-Class Text Classification Models with RNN and LSTM
- Build A Book Recommender System With TF-IDF And Clustering(Python)
- Multi-Modal Retrieval-Augmented Generation (RAG) with Text and Image Processing
- PyTorch Project to Build a GAN Model on MNIST Dataset
- Build ARCH and GARCH Models in Time Series using Python
- Human Action Recognition Using Image Preprocessing
- Time Series Analysis with Facebook Prophet Python and Cesium
- Build a Face Recognition System Using FaceNet in Python
- Build a Collaborative Filtering Recommender System in Python
- guest-post-30
- Image Segmentation using Mask R CNN with PyTorch
- Fusion Retrieval: Combining Vector Search and BM25 for Enhanced Document Retrieval
- HyDE-Powered Document Retrieval Using DeepSeek
- Graph-Enhanced Retrieval-Augmented Generation (GRAPH-RAG)
- Context Enrichment Window Around Chunks Using LlamaIndex
- Document Augmentation through Question Generation for Enhanced Retrieval
- Enhancing Document Retrieval with Contextual Overlapping Windows
- Corrective Retrieval-Augmented Generation (RAG) with Dynamic Adjustments
- Optimizing Chunk Sizes for Efficient and Accurate Document Retrieval Using HyDE Evaluation
- Sign language recognition
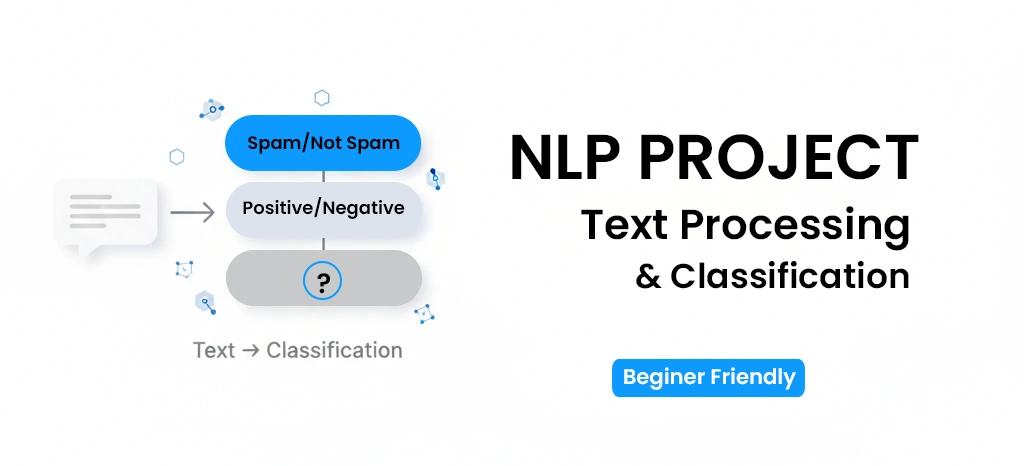
NLP Project for Beginners on Text Processing and Classification
Have you ever questioned how objects interpret or categorize text? This project provides insight into text processing as well as text classification with the use of NLP. It is a beginner-focused project where one gets the theory but also has practice in creating a machine-learning model. Hence you will work with NLTK, Scikit-learn, Pandas and so on and learn how to clean, tokenize, and organize information into different categories.
Project Overview
In this project, you will delve into the machine’s ability to read and understand text with ease and classify it most appropriately. You will learn what natural language processing (NLP) is and the processes involved in preparing the raw text for further analysis. Libraries such as NLTK and Scikit-learn will be used to quantify the text into figures that will be used by the machine learning models.
Using CountVectorizer and TfidfVectorizer, you will learn how to perform feature extraction and use Logistic Regression to create a classifier. What’s the objective? Classify the emotion of a particular text as positive, negative, or neutral. In between, you will also check the performance of your model with the help of classification accuracy and confusion matrices so that it is not performing poorly.
This project will leave you with a functional text classifier and basic skills in using NLP techniques. This includes the understanding of how sentiment analyzers or rating systems work using reviewing web content. Hence this project is all about comprehending the text classification tasks!
Prerequisites
This project is beginner-friendly, but having some basic knowledge will make things smoother and more fun! Here’s what you need:
- Familiarity with Python programming and libraries like Pandas, Numpy, and Matplotlib.
- Having prior knowledge of concepts of machine learning, such as Logistic Regression.
- Familiarity with libraries such as NLTK library and the SKlearn library.
- Basic Familiarity with NLP concepts and techniques to apply to the text data.
Approach
This project applies a systematic approach to text classification using Natural Language Processing (NLP). It begins with installing essential libraries like Scikit-learn, Numpy, Pandas, NLTK, and Seaborn. Text data is then preprocessed through tokenization, stopword removal, and stemming using NLTK. Features are extracted using CountVectorizer and TfidfVectorizer to convert text into numerical representations suitable for machine learning models. Logistic Regression is utilized for text classification, with the model’s performance evaluated using metrics like accuracy, confusion matrix, and classification reports. Results are visualized using Matplotlib and Seaborn for clear interpretation. This hands-on approach ensures a practical understanding of NLP fundamentals.
Workflow and Methodology
Workflow
- Install necessary libraries like Scikit-learn, NLTK, Pandas, and Matplotlib for text processing and analysis.
- Preprocess raw text data by tokenizing, removing stopwords, and applying stemming techniques using NLTK.
- Convert text into numerical features using CountVectorizer and TfidfVectorizer for model training.
- Split the dataset into training and testing sets using Scikit-learn's train_test_split function.
- Train a Logistic Regression model to classify text sentiment as positive, negative, or neutral.
- Evaluate the model’s performance with metrics like accuracy, confusion matrix, and classification reports.
- Visualize results and metrics using Matplotlib and Seaborn for better insights.
Methodology
- Data preprocessing ensures text is clean and standardized for effective analysis.
- Feature extraction transforms text data into numerical formats suitable for machine learning models.
- Logistic Regression is used for its simplicity and effectiveness in classification tasks.
- Model evaluation measures accuracy and provides insights into prediction quality.
- Visualization helps to interpret results and identify areas for improvement.
Data Collection and Preparation
Data Collection:
In this project, we collected the dataset from a public repository. If you are looking to work on a real-world problem, you can get these kinds of datasets from publicly available repositories such as Kaggle, UCI Machine Learning Repository, or company-specific data. We will provide the dataset in this project so that you can work on the same dataset.
Data Preparation Workflow
- Load ut the text data in a Pandas Dataframe so that it can be manipulated and analyzed with ease.
- Correctly Format the text by removing unnecessary characters, punctuation, and noise.
- Tokenize the text into words/sentences using NLTK by implementing the tokenization methods.
- Eliminate any stop words such as the, is, etc. to retain only the important words in the text.
- Stemming or lemmatization is then done to ensure consistency in the usage of words by reducing them to their respective root forms.
- Vectors are formed out of the processed text using CountVectorizer or TfidfVectorizer.
- Split the dataset into training and testing sets to prepare for model building.
Code Explanation
Mounting Google Drive
First, mount Google Drive to access the dataset that is stored in the cloud.
from google.colab import drive
drive.mount('/content/drive')
Library Installation
The following code installs the required Python Libraries such as scikit-learn, numpy, pandas, seaborn, matplotilb, etc. They are employed to assist in Data Analytics, Visualization, Machine Learning and Natural language Processing.
!pip install scikit-learn
!pip install numpy
!pip install pandas
!pip install seaborn
!pip install matplotlib
!pip install collections
!pip install nltk
!pip install sklearn
!pip install warnings
Import Library and Environment Configuration
The following code imports data manipulation (NumPy, Pandas), plotting (Matplotlib, Seaborn), and NLP (NLTK) libraries. It also initializes machine learning libraries (scikit-learn), downloads the necessary NLTK resources, turns off the warning messages, and allows for the plotting in the notebook.
import pickle
import numpy as np
import pandas as pd
import seaborn as sns
import matplotlib.pyplot as plt
from collections import Counter
from nltk.corpus import stopwords
from nltk.stem import PorterStemmer, LancasterStemmer
from nltk.tokenize import sent_tokenize, word_tokenize, RegexpTokenizer
from sklearn.feature_extraction.text import CountVectorizer, TfidfVectorizer
from sklearn.linear_model import LogisticRegression
from sklearn.metrics import accuracy_score
from sklearn.metrics import classification_report, accuracy_score, confusion_matrix
import seaborn as sns
import matplotlib.pyplot as plt
import pickle
from sklearn.model_selection import train_test_split
import warnings
# Download necessary NLTK resources
import nltk
nltk.download('stopwords')
nltk.download('punkt')
# Suppress FutureWarnings
warnings.simplefilter(action='ignore', category=FutureWarning)
# Enable inline plotting for Jupyter Notebooks
%matplotlib inline
Loading Data and Checking Dimensions:
This code loads the CSV file. After loading the dataset it prints the dataset’s shape to check the number of rows and columns. The %time magic command in the notebook records the time taken to perform the task.
data = pd.read_csv("/content/drive/MyDrive/New 90 Projects/Project_8/Canva_ review_data.csv")
data.shape
Previewing Data
This block of code displays the first 3 rows of the dataset to have a quick overview of the structure of the dataset.
data.head(3)
Create a Subplot Grid for Data Visualization
This script creates a grid of 8 plots arranged in 2 rows and 4 columns to visualize several features of the dataset such as histograms, bar charts, heat maps, violin charts, scatter diagrams, and line graphs.
# Create a 2x4 subplot grid with a larger figure size to display the best 8 plots
fig, axs = plt.subplots(2, 4, figsize=(24, 12))
plt.subplots_adjust(hspace=0.6, wspace=0.6)
# Plot 1: Histogram of 'score'
data['score'].plot(kind='hist', bins=20, title='Score Histogram', ax=axs[0, 0])
axs[0, 0].spines[['top', 'right']].set_visible(False)
axs[0, 0].set_xlabel('Score')
axs[0, 0].set_ylabel('Frequency')
# Plot 2: Bar plot for Sentiment counts
data.groupby('Sentiment').size().plot(kind='barh', color=sns.color_palette('Dark2'), ax=axs[0, 1])
axs[0, 1].set_title('Sentiment Counts')
axs[0, 1].spines[['top', 'right']].set_visible(False)
# Plot 3: Bar plot for 'Sub Category' counts
data.groupby('Sub Category').size().plot(kind='barh', color=sns.color_palette('Dark2'), ax=axs[0, 2])
axs[0, 2].set_title('Sub Category Counts')
axs[0, 2].spines[['top', 'right']].set_visible(False)
# Plot 4: Heatmap of 'Sub Category' vs 'Sentiment'
df_2dhist = pd.DataFrame({
    x_label: grp['Sub Category'].value_counts()
    for x_label, grp in data.groupby('Sentiment')
}).fillna(0)
sns.heatmap(df_2dhist, cmap='viridis', ax=axs[0, 3], annot=True, fmt=".0f", cbar=False)
axs[0, 3].set_xlabel('Sentiment')
axs[0, 3].set_ylabel('Sub Category')
axs[0, 3].set_title('Sub Category vs Sentiment Heatmap')
# Plot 5: Heatmap of 'Sub Category' vs 'Sub Category_test'
df_2dhist_test = pd.DataFrame({
    x_label: grp['Sub Category_test'].value_counts()
    for x_label, grp in data.groupby('Sub Category')
}).fillna(0)
sns.heatmap(df_2dhist_test, cmap='viridis', ax=axs[1, 0], annot=True, fmt=".0f", cbar=False)
axs[1, 0].set_xlabel('Sub Category')
axs[1, 0].set_ylabel('Sub Category_test')
axs[1, 0].set_title('Sub Category vs Sub Category_test Heatmap')
# Plot 6: Violin plot of 'score' by 'Sentiment'
sns.violinplot(data=data, x='score', y='Sentiment', inner='box', palette='Dark2', ax=axs[1, 1])
sns.despine(ax=axs[1, 1], top=True, right=True, bottom=True, left=True)
axs[1, 1].set_title('Score by Sentiment')
# Plot 7: Scatter plot of 'score' vs 'thumbsUpCount'
data.plot(kind='scatter', x='score', y='thumbsUpCount', s=32, alpha=0.8, ax=axs[1, 2], color='coral')
axs[1, 2].spines[['top', 'right']].set_visible(False)
axs[1, 2].set_title('Score vs ThumbsUpCount')
# Plot 8: Line plot of 'thumbsUpCount'
data['thumbsUpCount'].plot(kind='line', ax=axs[1, 3], color='teal')
axs[1, 3].spines[['top', 'right']].set_visible(False)
axs[1, 3].set_title('ThumbsUpCount over Time')
axs[1, 3].set_xlabel('Index')
axs[1, 3].set_ylabel('ThumbsUpCount')
# Apply tight layout to prevent overlapping
plt.tight_layout()
plt.show()
This piece of code accesses the “review” column of the DataFrame for the row with the index number 1495.
data.loc[1495, "review"]
Fetching Specific Value
This piece of code accesses the “review” column of the data DataFrame for the row with the index number 13.
data.loc[13, "review"]
This piece of code accesses the “Sentiment” column of the DataFrame for the row with the index number 13.
data.loc[13, "Sentiment"]
This piece of code accesses the “Sentiment” column of the DataFrame for the row with the index number 1495.
data.loc[1495, "Sentiment"]
Count Plot for Sentiment Distribution
The following code generates a count plot that illustrates the ‘Sentiment’ values in the data DataFrame with the use of a ‘Set2’ color palette. It gives the idea of how much each sentiment category is present.
sns.countplot(x="Sentiment", data=data, palette="Set2")
plt.show()
Sentiment Categories Count
The following code counts the number of of each distinct value in the ‘Sentiment’ column of the data DataFrame and its shows the sentiment distribution statistics.
data["Sentiment"].value_counts()
Positive Sentiment Proportion
The calculation represents the proportion of positive sentiment among the total of positive and negative sentiments.
468/(1032+468)
Count Plot for Score
The following code generates a count plot that illustrates the ‘score’ values in the data DataFrame with the use of a ‘Set3’ color palette.
sns.countplot(x="score", data=data, palette="Set3")
plt.show()
Count Plot for Scores with Sentiment
This code generates a count plot that illustrates the distribution of values of "score" present in the data DataFrame across various categories of "Sentiment," with each category represented in a different color. It helps in understanding the variation of scores across different sentiments.
sns.countplot(x="score", data=data, hue="Sentiment")
plt.show()
Calculating and Explaining the Duration of Reviews
This code calculates the length in number of characters of each review present in the DataFrame, assigns it to a new column len, and gives summary statistics. For example, the average length of the review, shortest and longest reviews, and inter-quartile ranges.
data["len"] = data["review"].apply(len)
data["len"].describe()
Histogram of Review Lengths
This code builds a histogram for analysis of the distribution of review lengths in the len column of data DataFrame. It allows us to find patterns in the lengths of the reviews or the distribution of the review lengths.
sns.displot(data["len"])
plt.show()
KDE Plot for Review Length by Sentiment
This code generates a Kernel Density Estimate (KDE) plot which helps to view the distribution of review lengths (len) by sentiment categories filled for better clarity. It demonstrates the tendency of review lengths by sentiment.
sns.displot(data=data, x="len", hue="Sentiment", kind="kde", fill=True)
plt.show()
STEP 4
Filtering Data and Obtaining Particular Review
This code filters the information contained within the DataFrame object – data – to focus on the “review” and “Sentiment” fields only. Next, it gets the “review” string from the text for the entry that is located at position 13 (i.e. row with index 13).
data = data[["review", "Sentiment"]]
data.loc[13, "review"]
Sentence Tokenization of a Specific Review
The following piece of code uses the sentence_tokenize function from the NLTK to break down the 13th index text into individual sentences. It gives back several sentences that comprise the review.
sent_tokenize(data.loc[13,"review"])
Fetching Specific Value
This piece of code accesses the “review” column of the data DataFrame for the row with the index number 1495.
data.loc[1495, "review"]
This code splits the 'review' text from index 1495 in the data DataFrame into individual sentences in a list.
sent_tokenize(data.loc[1495, "review"])
Word Tokenization of a Specific Review
This piece of code tokenizes the 'review' text of data DataFrame indexed at 13 using the word_tokenize method from NLTK library. It outputs a list containing words and punctuation from the review.
word_tokenize(data.loc[13, "review"])
This piece of code tokenizes the 'review' text of data DataFrame indexed at 1495 using the word_tokenize method from NLTK library. It outputs a list containing words and punctuation from the review.
word_tokenize(data.loc[1495, "review"])
Creating a List of Reviews
This code stores all the values from the "review" column of the data DataFrame as a list in the variable reviews.
reviews = list(data["review"])
This code checks the total number of reviews in the reviews list.
len(reviews)
Accessing a Specific Review
This code retrieves the 14th review (index 13) from the reviews list. It returns the full text of that review.
reviews[13]
This code retrieves the 1496th review (index 1495) from the reviews list. It returns the full text of that review.
reviews[1495]
This code retrieves the 1496th review (index 1495) from the reviews list. It returns the full text in lowercase of that review.
reviews[1495].lower()
Changing the Case of Reviews to Lowercase
The following code creates a new list reviews_lower converting all the reviews present in the reviews list in lower case.
reviews_lower = [r.lower() for r in reviews]
This code retrieves the 14th review (index 13) from the reviews list. It returns the full text of that review.
reviews_lower[13]
Alternative Method for Converting Reviews to Lowercase
This code uses a for loop to iterate through the reviews list, converts each review to lowercase, and appends it to the reviews_lower list.
reviews_lower = []
for r in reviews:
    reviews_lower.append(r.lower())
Tokenizing All Lowercase Reviews
The following implementation takes each review from the reviews_lower list and splits it into constituent words using word_tokenize. It creates a nested list, where each inner list contains the tokenized words of a single review.
tokens = [word_tokenize(r) for r in reviews_lower]
This code retrieves the 14th review (index 13) from the tokenized list. That specific review is broken down into individual words by punctuation marks.
tokens[13]
This code retrieves the 1496th review (index 1495) from the tokenized list. That specific review is broken down into individual words by punctuation marks.
tokens[1495]
This code checks the total number of reviews that have been tokenized in the token list.
len(tokens)
Defining Stopwords for English
Using NLTK’s stopwords.words() function this code loads a predefined list of common English stopwords. The variable sw often stores the list of words used to remove words that are irrelevant, such as the, is or and from the text during preprocessing.
sw = stopwords.words('english')Displaying the First 10 Stopwords
This code retrieves and displays the first 10 stopwords from the sw list.
sw[:10]
Eliminating Stop Words From the Tokenized Reviews Diagram
The current implementation removes all the stop words from each of the tokenized lists in tokens. The final list of tokens for each review without any meaningless words allows for better text analysis.
tokens = [[word for word in t if word not in sw] for t in tokens]
This code retrieves the 14th review (index 13) from the tokenized list. That specific review is broken down into individual words by punctuation marks.
tokens[13]
This code retrieves the 14th review (index 13) from the reviews list. It returns the full text of that review.
reviews[13]
This code retrieves the 1496th review (index 1495) from the tokenized list. That specific review is broken down into individual words by punctuation marks.
tokens[1495]
This code retrieves the 1496th review (index 1495) from the reviews list. It returns the full text of that review.
reviews[1495]
Remove punctuations
Setting up a Regular Expression Tokenizer
This code takes a RegexpTokenizer object that tokenizes the text by matching only word characters ( \w+ ). It does not include punctuation and symbols so that the tokens are only words.
tokenizer = RegexpTokenizer(r'\w+')
The tokenizer splits words into word pieces, separating contractions with spaces, and stems word characters.
tokenizer.tokenize("wasn't")
Tokenizing Text with Regular Expression Tokenizer
This code also tokenizes the term 'wasn't' using the RegexpTokenizer. It splits up the text into words like 'wasn', 't', without punctuation but allowing word characters only.
t = tokenizer.tokenize("wasn't")Combining Tokenized Words
This code combines the words in t in a single string with no spaces in it. For instance, ['wasn', 't'] is combined to form "wasnt".
"".join(t)
Tokenizing the Colon
This code uses RegexpTokenizer to tokenize the colon (:). Since the tokenizer only extracts word characters (\w+), the result will be an empty list.
tokenizer.tokenize(":")
Cleaning and Merging the Individual Words into a Sentence
This code cleans every tokenized word contained in the tokens list. In addition, it merges token parts that are not empty and removes all such empty results, thus producing a neat and orderly tokens list.
tokens = [["".join(tokenizer.tokenize(word)) for word in t
       if len(tokenizer.tokenize(word))>0] for t in tokens]