Chatbots have been dramatically changing user interaction across various platforms on the internet. It is a handy tool when it comes to small online businesses and e-commerce platforms. You will find use cases of chatbots in numerous areas including healthcare, banking, customer support, sales and marketing, and so on.
For that, the need for building more and more chatbots is increasing also. If you are new to this whole chatbot thing and don’t know where to start. Don’t worry! In this tutorial, I will guide you through all the step-by-step processes to build a complete restaurant service chatbot using Rasa and a small bit of python. Let’s dive into it!
What is a Chatbot and How Does It Work?
If you don’t have a clear idea about chatbots, let me give you a quick intro. In general terms, it is nothing but a software powered by artificial intelligence that can replicate human conversation. That is it can talk to you like a human agent. Using machine learning or deep learning and natural language processing, we can build a chatbot and train it using text data of various forms. It operates the same way as instant messaging. You ask something to the chatbot and it instantly replies based on its previous learning from training data. If you ask something that it is not familiar with previously, it could pass it to a human operator or possibly respond with some kind of “Sorry, I could not understand the question” or “I have no idea about this” responses. Deep learning has been used to learn and overcome these shortcomings. When enabled with deep learning, a chatbot could gradually learn from user behavior patterns. Most of the recent chatbots must include deep learning technologies for better performance.
What is Rasa Stack?
Rasa is a python based open-source platform that uses the stage of art Natural Language Processing techniques and algorithms to let you build amazing chatbots. It has implemented most of the useful stacks that we need to build a chatbot. With Rasa, we can build any type of chatbots we want with ease and comfort. And there are quick and easy ways to deploy and integrate your chatbot online and other platforms including websites and social media, mobile apps.
Rasa offers two different sets of development modules- Rasa NLU and Rasa Core. Let’s have a brief overview of them.
Rasa NLU Rasa NLU is the part of the Rasa stack that extracts entities from the conversation, classifies intents of the message and retrieves responses for chatbots. This part uses the Spacy and Tensorflow library from Python to do this task.
Rasa Core This is the most important component of Rasa Stack. It mainly controls contextual message flow. It tries to predict the most accurate reply for the user messages and can perform customized API calls from Rasa Action Server.
There is another optional component that comes independently from Rasa Stack called Rasa X.
Rasa X It provides a GUI environment on your browser and consists of a set of tools that offers you to train your chatbots on the browser side. With the help of Rasa X, you can review the conversations between users and your chatbot. Analyzing the conversations, you can find useful patterns which you could use to improve your chatbot over time.
Rasa vs Dialogflow: Why we should use Rasa?
There are many systemic differences between both of the chatbot building platforms. Dialogflow is from the tech giant google and out there for quite a long time. Whereas Rasa is a relatively new platform. But there are some important reasons why we choose Rasa instead of Dialogflow. Have a look-
-
Rasa is open source. So you can customize everything to fit the business requirements. Dialogflow is not open source and does not allow you to customize anything from the scratch.
-
Rasa introduced stories, a unique ML-based contextual dialogue management approach that eases the hassle of rule-based dialogue management techniques. Dialogflow uses a rule-based dialogue management approach.
-
Rasa supports complete migration from most of the popular bot building platforms and frameworks including Dialogflow, Wit.ai, Amazon Lex, IBM Watson and more. Whereas Dialogflow only offers migrations from Amazon Alexa and its own assistant platform, google assistant.
Build a Restaurant Chatbot with Rasa and Python
In this tutorial, we are going to build a simple and powerful chatbot for finding restaurants and ordering food through it. For this, we will use the powerful Rasa framework and a bit of Python. So let’s get started!
Install Rasa Stack and Its Dependencies
If you have Anaconda already installed into your environment, it’s a good practice to set up a virtual development environment for Rasa.
Go to your anaconda prompt and type the following command-
conda create --name rasaThis will create a separate rasa environment for the development of chatbots.
If you have not installed Anaconda, get it from here.
Now, activate the rasa development environment.
conda activate rasaRasa depends on Tensorflow to run its NLU and core models. In case you don’t have it, install Tensorflow first-
conda install tensorflowYou require ujson library to do some operation-
conda install ujsonNow you can easily install the Rasa framework with the following command-
pip install rasaThis should install rasa and all its dependencies in your virtual environment. If you run into any troubles installing rasa. Check their official install documentation.
Create a New Project in Rasa
Let's make a new project in rasa with the following simple command.
rasa initThis will create a new rasa project in your specified directory. Rasa NLU provides a built-in nlu model. You can train that model and interact with it.
The new project will have the following structure-
|--__init__.py
|--actions.py
|--config.yml
|--credentials.yml
|--data
|   |--nlu.md
|   |--stories.md
|--domain.yml
|--endpoints.yml
|--models
    |__ <timestamp>.tar.gz
All the files come with some default values and settings. All we have to do is to modify all the files to make our chatbot up and running. It is as simple as that.
Write and Extract Intent from the User Message
Rasa chatbot requires writing intents which will be used as training data for the model. Intents are nothing but a set of questions or statements written in YAML format. Based on these predefined intents the bot will understand the user intents from their message.
The intents are written in the nlu.md file. There are several default intents like the following-
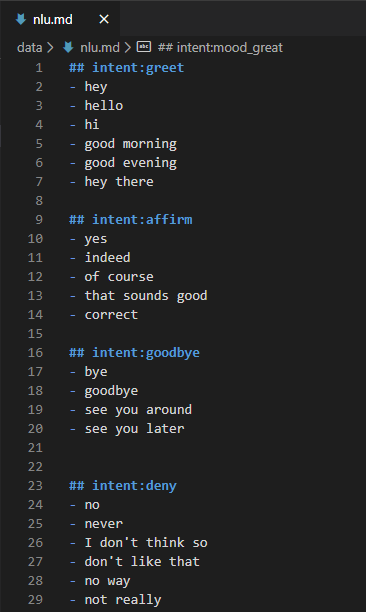
We need to add more intents that are necessary to train our chatbot to understand user intents. As we are building a restaurant chatbot, obviously the intents will be related to restaurants. Let's write some of them-
## intent:search_restaurant
- Show me the nearby restaurant
- Where can I find a restaurant
- I want to go to a good restaurant
- Is there any good restaurants nearby
- show me some good restaurants
You can write some more intents. But there is no need to write more than 10 or 15 sentences as it would consume a lot of development time. Rasa supports interactive learning through user inputs. You can use that feature approach to directly train your model with user intent.
After writing a good amount of intents we need to register the intents to the domain.yml file.
Domain refers to the universe of the Rasa chatbot. Here you should define everything including the intents, entities, slots, and actions your bot must know to understand and reply to the user message. Sometimes you can add responses that the chatbot can say.
It looks like the following-
Remember, you need to include every intents, entities, slots, and response in this domain.yml file. Otherwise, it will throw errors while in training.
Let's test how well the in-built NLU feature of rasa can extract user intent. Go to the command prompt and write the following command. Don't forget to check whether the rasa virtual environment is activated.
rasa train nluCompleting the training, initialize the rasa shell. Rasa Shell is an interactive shell that comes with Rasa stack to check various functions of your chatbot in the command line
rasa shell Let's say something to our bot-
show me restaurantsThe output will be the classification of intents that we have defined earlier in the intents section.
{
  "intent": {
    "name": "search_resturant",
    "confidence": 0.9999473094940186
  },
  "entities": [],
  "intent_ranking": [
    {
      "name": "search_resturant",
      "confidence": 0.9999473094940186
    },
    {
      "name": "mood_unhappy",
      "confidence": 4.397923839860596e-05
    },
    {
      "name": "goodbye",
      "confidence": 4.263904884282965e-06
    },
    {
      "name": "greet",
      "confidence": 1.823853835958289e-06
    },
    {
      "name": "bot_challenge",
      "confidence": 1.310950437982683e-06
    },
    {
      "name": "deny",
      "confidence": 6.058926942387188e-07
    },
    {
      "name": "mood_great",
      "confidence": 3.7935004115752236e-07
    },
    {
      "name": "affirm",
      "confidence": 3.4573960761008493e-07
    }
  ],
  "response_selector": {
    "default": {
      "response": {
        "name": null,
        "confidence": 0.0
      },
      "ranking": [],
      "full_retrieval_intent": null
    }
  },
  "text": "show me restaurants"
}
The NLU part of Rasa Stack classifies the intents and ranks them according to their confidence score. The chatbot will follow the intent with the highest confidence and take action according to that intent. We have to define the actions a chatbot should take according to the intent in the actions.py file. We will discuss actions later.
Write Rasa Stories to Design the Conversational Flow
Rasa uses Story, a form of training data to train its dialogue management models. A story represents the actual conversation between a chatbot and a user. In a story, the user inputs are formatted as corresponding intents and entities and the response of a chatbot will be action names according to the user intent.
Writing a story is fun and easy. We will define two basic conversational flows for now-one for when the bot could find the exact thing user was looking for and another one when it does not. The stories are defined as paths.
## search restaurant happy path

* greet

  - utter_greet

* search_resturant

  - action_search_resturant

  - utter_did_that_help

* affirm

  - utter_goodbye

## search restaurant sad path

* greet

  - utter_greet

* search_resturant

  - action_search_resturant

  - utter_did_that_help

* deny

  - utter_default

* search_resturant

  - action_search_resturant

  - utter_did_that_help

* affirm

  - utter_goodbye
In the story, a user would start a conversation and the chatbot will reply after that. The response of a chatbot can be either an utterance action or a custom action. You can hardcode the utterance actions in the domain.yml file. But you need to write codes to run the custom actions. Let's talk about this custom action.
Write Custom Actions in Rasa
Custom actions are any code you write to run after a specific intent detected by the bot. A custom action can be anything like fetching data about nearby restaurants, checking a user's bank account, processing orders, showing product specifications, or anything you could imagine.
In a custom action, you should specify an endpoint that will be called by your chatbot when a custom action is predicted. Here the endpoint resembles a web server that listens to the call, runs the codes, and sometimes returns information to the user.
You can create action servers using any language and framework including node.js, .NET, or Java. Rasa SDK provides a convenient way to write custom actions and execute them in python. We are going to use that to write our custom actions.
from typing import Any, Text, Dict, List
from rasa_sdk import Action, Tracker
from rasa_sdk.executor import CollectingDispatcher

class ActionSearchResraurant(Action):
    def name(self) -> Text:
        return "action_search_restaurant"

    def run(self, dispatcher: CollectingDispatcher,
            tracker: Tracker,
            domain: Dict[Text, Any]) -> List[Dict[Text, Any]]:

            dispatcher.utter_message(text="Ok! I am searching restaurants for you")
This is the most basic form of a custom action. You need to write more codes to do more powerful tasks like placing orders or making transactions from the user's bank account. For this, you need to add various APIs to the action and parse the data in user-understandable formats.
After writing up all these things, we are now ready to train our core model. But before going to train our model, we need to set up policies.
Configure Policies in Rasa
Policies maintain each action of your chatbot should perform during the conversation. There are many policies to help you customize the behavior of your chatbot. For this chatbot, configure your policies into the config.yml file like the following-
policies:
    - name: MemoizationPolicy
    - name: TEDPolicy
      max_history: 5
      epochs: 100
    - name: MappingPolicy
Train and Run the Chatbot in Rasa
We have completed all the necessary steps to build our restaurant chatbot. Let's train it using the following command-
rasa train coreWith this command, your core model will be trained. This will take some time.
When the training is done, test the chatbot. Initiate the rasa shell for that.
rasa shellLet's see how our chatbot is performing. Ask it some questions and get answers!
hi!
Hey! How can I help you?
Is there any good restaurants nearby?
Ok, I am searching restaurants for you
Final Thoughts
Congratulations! We have completed building a chatbot using Rasa and Python. Though it is naive and simple, from here you can customize the chatbot for more complex conversations. Go to the Rasa documentation and try to tweak the chatbot for a more useful purpose. Add more stories and custom actions. If you have any different approaches to apply, do that.
You can find the source code of the tutorial in this Github repository.
I hope the tutorial was helpful to you. If you have any suggestions to improve the project, please make your comment below.